
It’s been a long time for this computer. I dragged her through high school and all of art school. I wrote my papers, did some video titling, played Eye of the Beholder, composed some MODS and then programmed way too many RPG tools for various paper game systems. On my last week of school she died. I started working at a PC Lab, which got me a 486 DX50 and busy with other things.. “Yuri” got put in storage until I had time to work on her.
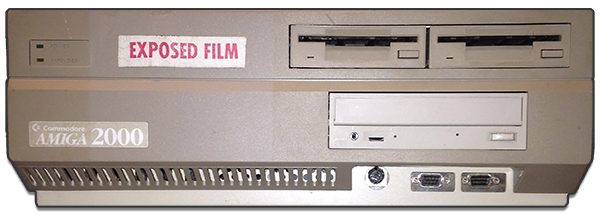
Over the years I’ve stacked up a few Amiga parts and then ran into a cache of *many* by fluke (ask Tak). My original 2000 “Yuri”, had a Compsec SA2000 SCSI HD Controller, 2091 ram expander and two floppy drives. This Amiga was a later version, with the 1MB Angus. In the day, this machine was good for everything that I needed. But the day a group of friends upgraded, my 68000 “Yuri” was a little jealous. I always wanted her to kick a little ass 🙂
Yuri had a bad power supply, which was the only thing that was wrong. I pulled one out of a 2000 with a damaged (bashed in more like it) motherboard. So Yuri booted, the 180MB drive started into WB1.3.
So begins the project, upgrade Yuri to the best she can be. (or with what I can dig up)
Starting with :
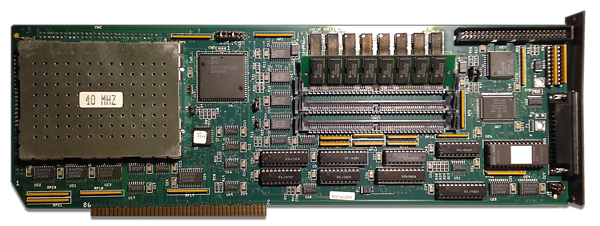
I’ve always wanted a GVP Accelerator. G-Force 030 (Impact A2000-030 Combo Series II) is nothing to sniff at either. The problem with this card was the missing jumpers everywhere :). Also, trying to figure out which GVP it was, makes life a little difficult. I got the card working with 8megs of ram.
I knew that the old drive was not going to be an easy port over. Controllers of this era were pretty much tied to the drive and vice versa. So hooking up will not work. Having both controllers in the machine didn’t work. So Old one in, while I figure a way to get all my stuff off.
Yuri’s Old Drive: Fujitsu M2614SA (180MB) formatted 20 Megs DH0:, 40MB DH1: and 120MB DH2:
Ways to get stuff off an Amiga to another machine:
1. Serial off the mother board (slow) or off a Serial Card with a decent Speed (need a cable and/or Card)
2. Network Adapter, TCPIP Stack and some basic Networking. Need OS 2.0+ as well.
3. SCSI Controller in a PC that is physically compatible (SCSI1/2) with Amiga SCSI and Copy Disk Images. (needs a PC with SCSI controller, HD Imagining Software)
4. Throw Amiga Explorer into the mix, great tool.
Serial, motherboard, slow.
You can always fail back to basic serial. It’s nice that it works and often I would just use it to prove that communication was possible while I pulled my hair out trying to get faster methods to work.
I transferred some files off using Terminal software to my lab PC. With the rats nest of cables, trying to find a serial cable that would work was a pain. I even slapped in an HST 19.2 modem (the one I used in Art School) and a 14.4 in the PC to see how that would play out. Slow… but worked.
Transferring data using AExplorer over serial, Amiga motherboard serial was painful. The only thing worse is sneaker net. I had a few other Amigas around that needed to be backed up, so a faster method was needed.
Serial Using HyperCOM4 (has 4 High Speed Seral ports)
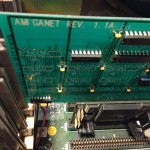
Well I found one of these on Ebay, ordered it and it also came with a AmigaNET Rev 1.1A Hydra 10BaseT2/AUI Network Adapter. The network adapter used BNC/AUI which would need some work to get physcially wired up to my home network, so I opted for the serial first. This seemed like a logical decision as I had basic serial working so going from 19.2 to 115.2KBaud would be 5-6x times speed boost and shouldn’t be much problems to achieve.
Wrong!
No matter how I hooked up the card, its ports which port used or driver choice I could get it to communicate. I installed the latest Driver used the DEVS:hyperCOM40.device as part of the AExplorer config. Here is what I used:
Run >NIL: <NIL: sys:AExplorer/AExplorer >NIL: <NIL: SERDEVICE DEVS:hyperCOM40.device SERBAUD 19200 SERUNIT 0
A few things to keep in mind when using other using DEVS: devices,
1. The file name is case sensitive…
2. SERUNIT is for the different ports on the card, the mainboard serial is SERUNIT 0.
3. Multiple HyperCOM’s are differentiated between hyperCOM40, hyperCOM41, hyperCOM42..etc. You can have as many as 4 or 5 in an Amiga.
I figured out what serial port was what on the card, I had all 4 ports wired up to the card and then connected one to the NULL modem cable. Then I cycled through SERUNIT 0-3. 3 out of 4 ports would throw an error on the PC side saying that there was nothing hooked up and to check the connection. The other error that popped up on the one was “COM Error”. So I guess that means that’s the active port 🙂
No setting’s combo on either side would work. I know the cable and PC config works, as the Amiga main board serial works fine. I managed to open a terminal window on the PC side and mounted AExplorer on the Amiga side. The result was some formatted, structural garbage. So something is going somewhere…
After extra gray hair, I moved on to the next option, which was based on the a trip to the basement. A basement which is like the interior of Jawa Sandcrawler. Really, the Ark of the Covenant is down there too.
Mounting an AMIGA SCSI disk in a PC
I found a PCI 2950UW Controller in the basement, dug further into the piles and found parts for a PC to host the controller.
Built a Windows 2003 Server with 2GB of ram, 80GB Drive and the 2950. Dug up a batch of SCSI cables, found three drives from a derelict HP server that were all too large for use in an Amiga but found a 2GB Baracuda that was compatible.
Most of the problems here revolved around SCSI termination, most of the Amiga HD’s are old technology wise and were designed to either be the only device in the chain or the termination was non-existent. My testbed drive was from one of the spare A2000’s which didn’t have stable termination and didn’t provide stable termination power. Besides, screwing around with the drive’s mainboard and jumpers is too much of a pain… I just used the best SCSI trick you can do.
Mount another drive on the end and make sure it has term power enabled and termination resistor packs. One of the HP server drives did the job. The drive mounted on the SCSI chain without any further problems.
I downloaded a disk imaging software that was freeware/trial ware and ripped an HDF image of my test machine (an 2000 with standard commodore controller). I think the drive was going to have a heart attack, it was never probably pushed that hard in its life.. The disk image moved over in about a few minutes. I copied the file over to my PC dev machine and mounted it in an emulator and there was the test machine running on a PC.
Well, I cracked open “Yuri” and noticed the drive was full height 5 1/4 sized drive… and thought about the last time I saw one of those.
It was huge. I pulled the drive and mounted it into the PC SCSI box and about 5 minutes later the entire drive was imaged. But when I mounted it in an emulator, the OS would not boot. A lot of goofing around yielded no results. I looked into the controller I was using, COMSPEC AS2000. It might be an insult to call it a SCSI controller, it had a non standard boot method and disk format. So I guess an image of this is useless if I can’t open it to get files out. I will have to send the specs out to someone else who might be interested in figuring out how to mount this image, but its out of my expertise. At moments like these its time to go…
Back into the Basement…
Found a Hub with a BNC port and Regular Ethernet (4 ports). You never know when these things are useful 🙂
Three Rules of BNC/10base-T2
1. New Cable Always
2. T connectors and proper 50 ohm Terminators
3. Ground one end of the network for stability.
Network Time…
I grabbed a test hard disk from the stack, installed WB and mounted the NIC in a test machine.
I have installed networking stacks on a lot of different machines, but doing it on the Amiga was unique. I upgraded the ROM to 2.04, then tried to get Miami DX to work. I had used WB1.3 for a long time, so moving around 2.04 involved tripping over things and totally not understanding why xyz doesn’t do 123.
Process for installing Miami
1. Install the MUI
2. Install the Network Drivers (me its the Hydra)
3. unpack both the Main and MUI drivers in one folder then install.
There is a lot of TCP/IP config to do once everything is installed correctly. I gave the device a fixed IP and configured things manually. I left one of the machines on my network pinging that static IP. As I messed around with settings and configs I kept an eye on the ping to make sure what I was doing was working or not. I am pretty confident with networking, I’ve wired up an entire school once with 10baseT2 and had to work in that lab for about year. So I had pulled some terminators out of the basement tool box some RG8 cable and T connectors.
The hub was working fine, I checked by hooking other devices to it and I could see them still on the network. So the problems was either a config in Miami (port filter/firewall/config) or its at the media level.
After screwing around with the cable enough, I checked one of my terminators and engraved on the end was 70 ohm. I went out the next day found an electronics store on College street that sells some weird stuff (they looked at me funny when I asked for the terminators: Sarah Conner?) and then they give me 70’s.. then I point out they are not what I want and then digging out the box I find two mismatched 50’s with grounding chains. That should have been the give away that there was no grounding chain, hey.. it’s been a while.
I hate that RG8 cable, really. Nightmares.
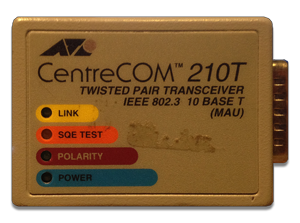
So this is our new friend, which means I don’t have to have mixed media types running through the network. Step on RG8 cable and forever watch that segment flap. So lets move into RJ45/CAT5 and be happy. I had a pair of these (see left) for networking older MAC’s at the school. I knew these would come in handy 🙂
Once the transceiver was connected, I adjusted the router (DD-WRT) dns server and DHCP client to give Yuri a static lease and DNS entry.
yuri.sx9.local
Once the network was working, (I totally miss command prompt networking tools) and DHCP was handled correctly, time for AExplorer.
The speed was amazing, copied the entire drive contents over in the blink of an eye (well it looks like that after sneaker net and MB serial).
I unplugged everything, mounted a CD-ROM, the Accelerator (with RAM), Serial Card, NIC and a 500 MB drive. Yeah, I know what you are thinking. But this drive was in packaging for a while, so it was as fresh as I could get in that class/age of HD.
 I re-installed everything from scratch, then copied the contents of my old drive over the network to the new Yuri. Time to see what blows up under OS 2.04 🙂
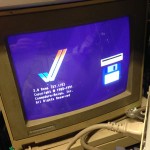
So after all that, Yuri is now on the network. Running at a decent clip. I installed (over the network!) SYSINFO V4 and checked out the stats, as seen below 🙂
(Click on the image to see the details)
I love the fact that it gives “Smell the Rubber?” as a comment. heheh.
OMG I have started my own resurrection of my Amiga 2000.
My ambition is to have it an “Rack” running away on a KVM, yeah I know some things will be a challenge but hey!
I am at the same stage you were at with the Serial Ports and have managed to get a HyperComm Card installed and am searching the new for, instruction on how this beast works!
See you have been past that stage and eventually landed on the networking method.
Has me thinking that it might save time, learn from where you got to and move towards the network now.
Curious to know how you are getting on now?
I have it rack mounted (along with an A3000 racked), both are on a VGA/KVM with a small 8 channel mixer for audio output. The A2000 also has the Goldfinger running outputs to the KVM and Audio mixer.
Everything works together. One of the main reasons for the networking method is just plain speed. Serial is really easy to setup (off the MB) but then the serial cards take a lot of work. The serial cards give better speed but not as reliable as the MB. If you are trying to archive an old system, then having the network helps. But if you are building from scratch then there are so many tools out there to get around direct connections. Floppy Emu’s and USB cards. Or mounting a VM of an Amiga and testing it on a PC first — then transfer the setup to the hardware via files or NIC. I have SD cards with all the different system combos out there.